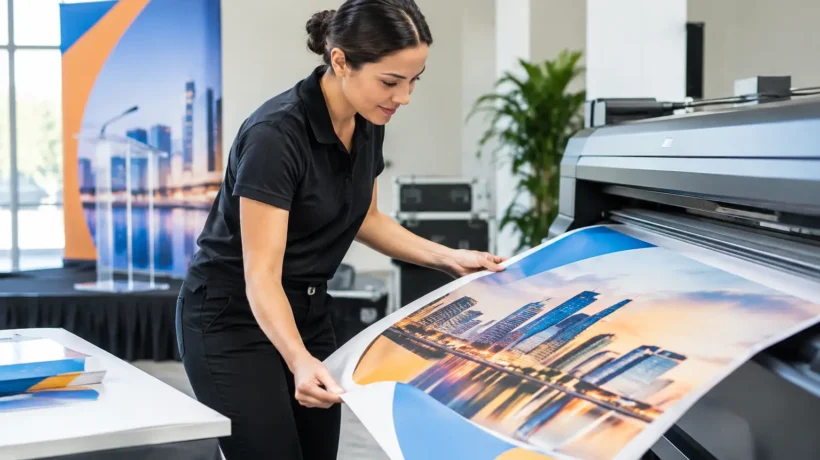
A compelling event presence can lose momentum in seconds when a backwall arrives with blurry imagery, a headline is hidden behind product shelving, or brand colors shift from one graphic to the next. This event graphics production guide helps marketing and event teams turn a strong concept into physical visuals that work under real show conditions – tight timelines, venue rules, freight schedules, and competing demands on internal resources.
Graphics production is not simply the final print step. It is where brand strategy, exhibit design, material selection, file preparation, and on-site execution meet. When those decisions are coordinated early, graphics do more than decorate a booth or environment. They direct attention, clarify value, support sales conversations, and create a more memorable brand experience.
Start With the Viewing Experience, Not the Print File
Before selecting materials or building artwork, consider how people will encounter the environment. A graphic seen from 30 feet away has a different job than one mounted beside a product demonstration. A retail wall may need to reinforce brand recognition over months, while a trade show graphic may need to earn attention in a crowded aisle within a few seconds.
Define the primary message first. What should attendees understand before they enter the space? What should they discover once they are engaged? Most event environments need a clear hierarchy: a high-level brand or campaign message visible from a distance, supporting proof points at mid-range, and detailed information available only where conversations happen.
This hierarchy keeps a booth from becoming a wall of competing claims. It also helps determine where graphics belong. Large-format backwalls, hanging signs, counters, dimensional elements, floor graphics, digital displays, and product kiosks should work as one visual system rather than as separate marketing pieces placed wherever there is open space.
Design for distance, traffic, and sightlines
A message can be technically legible and still fail in an event hall. Nearby booths, aisle traffic, overhead lighting, structural columns, furniture, and the height of the exhibit can all affect visibility. Ask where attendees will first see the display, where they will pause, and where your team needs conversation starters.
For example, a brand headline may belong high on a backwall or tower, while a product comparison belongs near the demonstration area. If a key message sits behind a table, monitor, or crowd line, it is not doing its job. Reviewing elevations and floor plans together prevents these common but costly misses.
Build a Production Plan Before Artwork Is Final
The most efficient projects treat production requirements as design inputs, not afterthoughts. Once a concept begins to take shape, confirm the graphic inventory, installation method, delivery dates, venue restrictions, and ownership responsibilities.
A production schedule should account for more than printing. It needs time for design review, copy approval, preflight, proofing, material sourcing, fabrication, finishing, packing, shipping, receiving, installation, and contingency. When a show date is fixed, every late approval narrows the options available later.
This is especially relevant for multi-event campaigns. A graphic package that works for one 20-by-20 exhibit may need adaptable components for regional events, smaller footprints, customer meetings, or corporate installations. Planning those variations at the start can reduce rework and protect brand consistency across the program.
Assign one owner for approvals
Many graphic delays are not caused by printing. They come from unclear approval paths. Marketing may own the message, a product team may need to validate claims, brand leaders may review visual standards, and event managers may need to confirm physical fit.
Identify a single decision-maker who can collect feedback, resolve conflicting comments, and release files for production. Establishing review rounds also matters. Open-ended revisions can consume the time needed for proofing and fabrication, forcing rushed decisions at the point where precision matters most.
Choose Materials for the Environment They Will Face
Material choice affects appearance, durability, cost, installation time, and reuse potential. The right answer depends on the graphic’s location and purpose, not simply on what looks best in a small sample.
Fabric graphics are popular for their polished appearance, portability, and ability to pack efficiently. They work well for tension-fabric systems, backwalls, hanging structures, and many rental exhibits. They can also soften lighting reflections compared with glossy surfaces. However, fabric may not be the best fit for every application, particularly when a rigid, dimensional, or highly durable surface is needed.
Rigid panels can create crisp architectural forms, support direct-mounted messaging, and hold up well in environments where a permanent or semi-permanent finish is expected. Vinyl graphics can be highly adaptable for walls, counters, windows, floors, and existing structures, but surface preparation and removal requirements need careful attention. A floor graphic that looks dramatic must also meet venue rules and withstand foot traffic safely.
Consider these practical questions before finalizing the specification:
- Will the graphic be used once, across a touring schedule, or in a permanent installation?
- Does it need to ship economically, fit in a crate, or travel as checked baggage?
- Will it be installed by a trained crew, event staff, or the client’s own team?
- Does the venue require fire ratings, approved adhesives, or specific installation procedures?
- Is the priority premium finish, quick changeout, long-term durability, or a balanced combination?
There are trade-offs. A premium rigid solution may create a stronger architectural impression, while a rental-based fabric system can provide high visual impact with less storage and asset-management responsibility. The production approach should support the program’s business case, not just its first appearance.
Prepare Files That Print the Way You Expect
Large-format graphics expose weaknesses that are easy to miss on a laptop screen. A low-resolution image may appear acceptable at five inches wide but break down when printed across an eight-foot wall. A color that feels accurate on screen may shift substantially when translated to a physical substrate.
Start with original, high-resolution assets whenever possible. Avoid enlarging small web images for major graphics. Vector artwork is typically preferred for logos, icons, and type because it scales cleanly, while photography should be supplied at an effective resolution appropriate to its final size and viewing distance.
Build artwork to the production template supplied for the specific display or surface. Templates account for trim, bleed, seams, hardware, frame edges, doors, monitor openings, and areas that may be obscured after installation. Do not place critical copy, logos, or faces near those boundaries.
Proof color and copy in context
Color management deserves more attention than a quick digital review. Brand colors can render differently on fabric, vinyl, rigid board, painted surfaces, and illuminated materials. Lighting can change the result again. If color accuracy is central to the brand, request a physical proof or color drawdown on the intended material when timing allows.
Copy proofing is equally important. At event scale, a small typo can become highly visible, expensive, and difficult to correct. Review every headline, product name, trademark, URL, legal statement, and data point against approved source material. Read the content at full scale when possible, especially for graphics intended to be viewed from a distance.
Plan for Installation, Freight, and the Unexpected
A graphic is only successful when it arrives in the right place, in the right condition, and can be installed correctly. That requires coordination among the exhibit team, printer or fabricator, freight carrier, venue, and installation crew.
Packaging should protect finished surfaces while making components easy to identify on site. Label graphics by location, orientation, and installation sequence. A numbered installation plan can save valuable time when crews are working under exhibitor move-in deadlines.
Confirm venue requirements early. Some facilities limit adhesive types, overhead rigging, floor coverings, delivery windows, or installation hours. Union labor rules and drayage procedures may also affect how graphics are handled. These details are operational, but they directly shape the finished experience and budget.
It is wise to prepare for practical failures: a damaged panel, a missing hardware piece, a delayed shipment, or a last-minute change to the floor plan. Keep replacement artwork and production files organized, and determine in advance which graphics are mission-critical if a rapid reprint is needed. Managed asset programs make this easier by maintaining current files, inventory records, and reuse history between events.
Make Graphics Part of the Event Strategy
The strongest event graphics support what happens before, during, and after attendees enter the space. They can reinforce a campaign promoted through email and social channels, give sales teams a concise way to frame the conversation, and create recognizable moments that attendees remember or photograph.
That does not mean every surface needs branding. In many environments, restraint creates more impact. Open space, intentional lighting, clear pathways, and one confident message can be more effective than filling every panel with copy. The goal is a presence that feels tailored to the audience and practical for the team operating it.
At FrontLine Exhibits, Strategically Applied Imagination means treating the visual idea and the production plan as one connected discipline. When graphics are designed for real distances, real materials, and real event conditions, they give your team something more valuable than a polished booth: the confidence to focus on the conversations that move the business forward.